Matcha Cake with Sesame Frosting

I fell in love with the Matcha-Black Sesame Frosting when my father scooped both those flavours into the same bowl at a dinner buffet in Hokkaido. Have I told you how delicious Hokkaido ice cream is??? It was so good that I even ate it for breakfast hahahaha.

IMG_0986

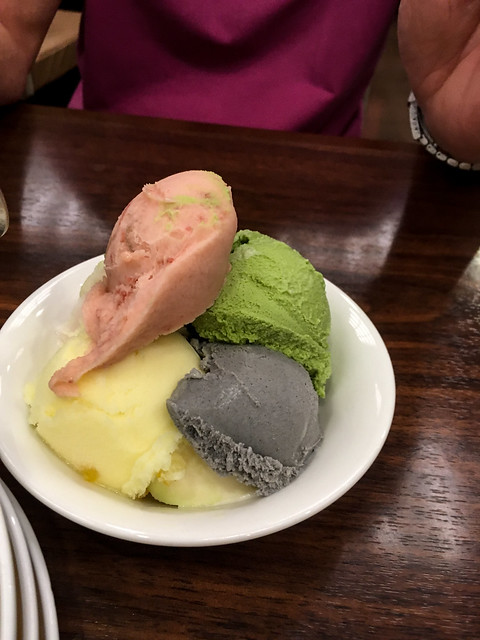
Anyway, the combination is so amazing, it definitely needed to be translated into a cake form.

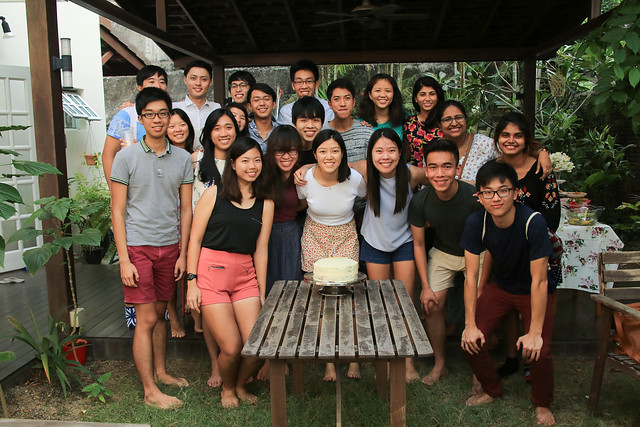
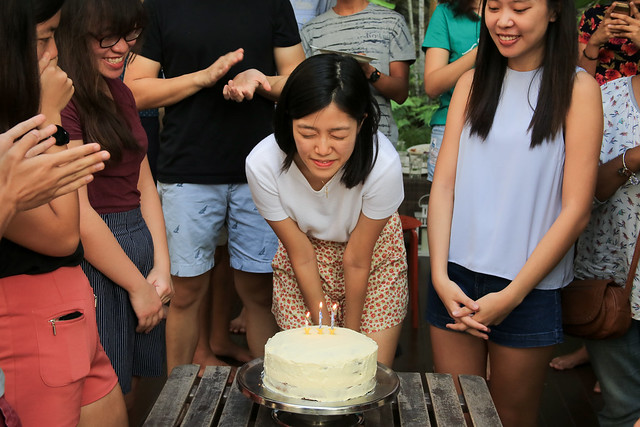
Y’s birthday was today and tadah, no surprise that he loved matcha (everyone does) so it was a perfect opportunity to use the matcha and black sesame that I brought back from Japan.

541A5991 541A6005

At first, I was going to follow mynameisyeh’s recipe to the T but the cake didn’t seem very nice to eat. It looked pretty but there’s more to cakes than appearances right? (as with everything, I hope)

So I was basically free styling a matcha cake and hoping that everything would turn out good, especially since it was someone else’s birthday cake.

I figured buttercream could be replaced with yogurt, since the purpose of both ingredients was the same, which was to make the cake moist. In addition, I replaced the boiling water with boiling milk to add more taste to the cake. Lastly, the directions in the original recipes were so vague, I had to come up with my own way of making the cake, with past experience of course.

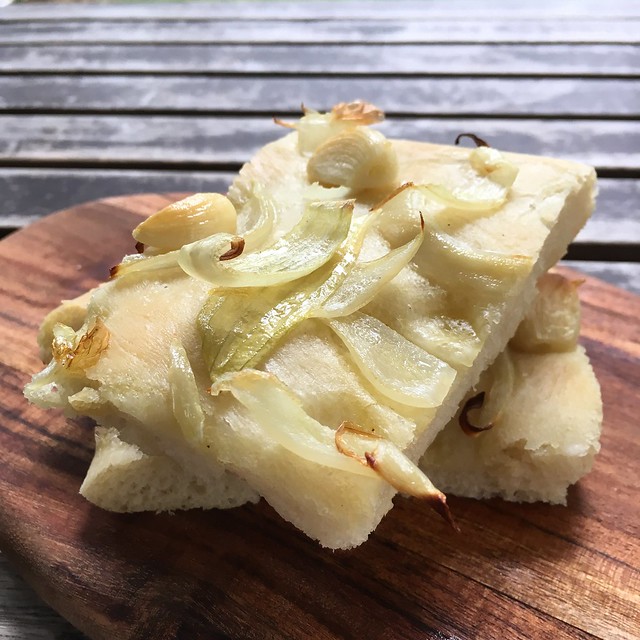
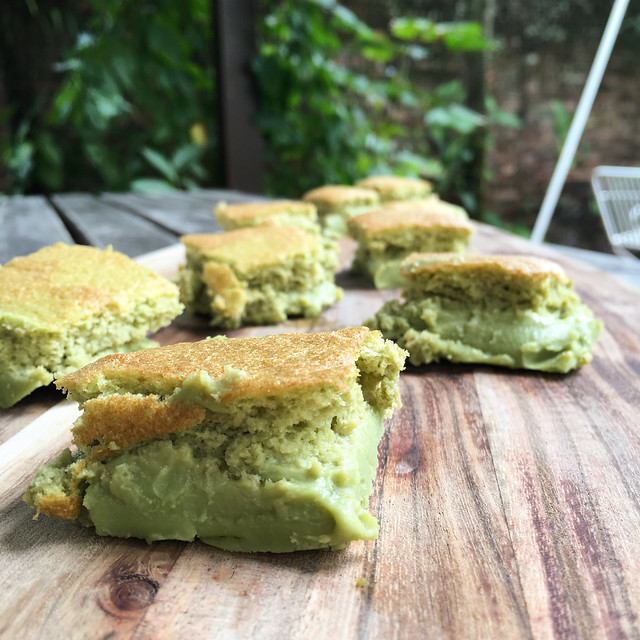
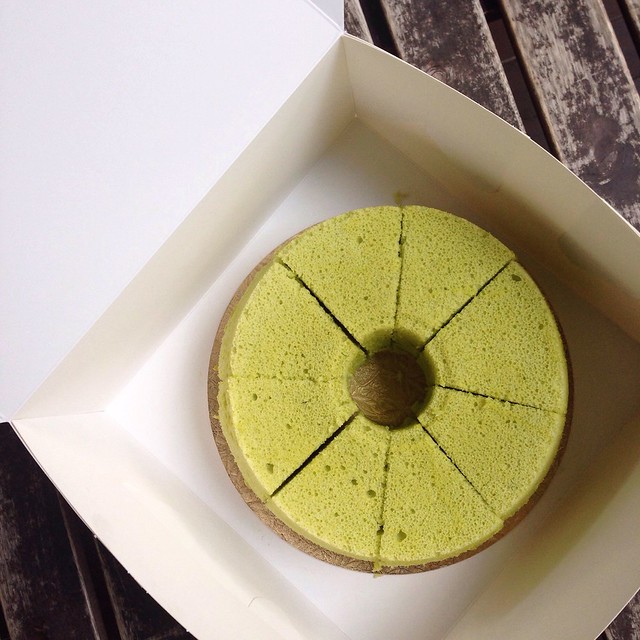
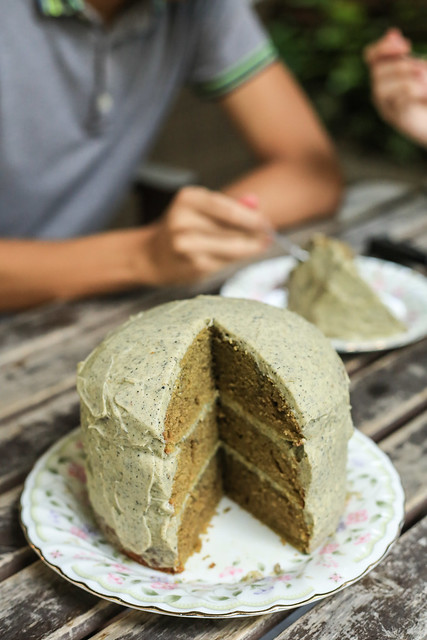
So I present with you my Matcha Cake with Black Sesame Frosting πŸ™‚

541A5984

Makes 3 layers of 6 inch round cake or 2 layers of 9 inch round cake

Ingredients
2 1/2 cup plain flour
1 cup caster sugar
4 tbsp matcha
1 1/2 tsp baking soda
1 1/2 tsp baking powder
1 1/2 tsp salt
2 large eggs
1 cup yogurt
1/2 cup vegetable oil
3/4 cup boiling milk
4 tbsp black sesame, toasted
2 cups butter
1/2 cup icing sugar

Directions
1. Preheat oven to 170 degrees Celsius
2. Line a 6 inch round tin with baking paper
3. Sift plain flour, baking soda, baking powder and matcha powder together. Mix in salt.
4. Using a paddle attachment, beat sugar and oil until smooth and well-mixed
5. Add yogurt and continue beating for 1 minute
6. Add in eggs one by one until well-mixed
7. Using a spatula, fold the wet ingredients into the dry ingredients
8. Fold in the boiling milk
9. Pour batter into lined baking tin (divide batter into 2 / 3 batches depending on tin size) and bake
10. Check for doneness at 25 minute mark
11. Beat black sesame, butter and icing sugar together, adjust icing sugar according to desired sweetness
12. Frost the cake and enjoy!

Focaccia Bread

Sorry for the really really long hiatus ): My family is without a helper right now so I’ve been busy doing house chores and cooking the meals. It’s been super tiring cooking most of the meals and running around, so much so that I can see why being a housewife is a legit job all by itself. Hats off to all stay home moms!! On the bright side, I’ve been learning chinese cooking from my mother and trying out new recipes! I now pride myself in ‘marriage worthy veggies’, knowing how to stir fry my chinese vegetables and turning purple cabbage edible. More on my veggies later πŸ™‚

Also my 21st birthday just passed so I was a bit busy preparing my food for my party. It was a two day baking fiesta, consisting of carrot cake, lemon cake, earl grey tea cake, chocolate chip cookies and pizza. Decided to treat my friends to all my home baked stuff to show my appreciation for their wonderful presence in my life :))

541A3364-2

Thank God for my mother and D for being kitchen assistants πŸ™‚ Also, D came up with a super awesome drink combination of sprite, lemon and mint. Try it out if you need respite on a sweltering hot day (which means tomorrow).

541A3414-2

541A3422-2

541A3442-2

Anyway!
Today’s post is on anΒ amazing focaccia bread that I made for my family for lunch.Β I was a bit fearful and skeptical about how it would turn out because I never ever had affinity with bread making. But this bread is soft and pillowy. Topping it off with roasted garlic and onions made it perfect πŸ™‚ Can’t wait to make this more often just that I’m not really in the mood of cleaning up ten million baking equipment right now hahah but do try this out if you love bread and have lots of time to spare, waiting for bread to rise. It’s worth the wait.

IMG_8853

Focaccia Bread
from Epicurious
40cm x 30cm focaccia bread

Ingredients
350ml cold water
20g instant dry yeast
625g plain flour
13g salt
70ml olive oil, plus extra for greasing

Directions
1. Place all ingredients in the bowl of your stand mixer.
2. With a dough hook, knead for 5 minutes. Turn up the speed by 1 level and kneed for another 10 minutes until dough is smooth.
3. Transfer dough into a lightly greased mixing dough and cover loosely with a cling wrap. Wait for the dough to double, approximately for 1 hour.
4. Turn out dough onto lightly floured surface. Punch down and flatten onto lightly greased baking tray. Spread till approximately 40cm x 30cm, not taller than 1/2 inch.
5. Brush with olive oil and proof for another 15 minutes.
6. Place desired toppings on dough and proof for another 20 minutes.
7. Bake at 210 degrees Celsius for 15 minutes.
8. Remove from oven and brush with olive oil. Cool before serving.

Apple Crumble Overnight Oats

541A3205-2-2

Always wanted to share my overnight oats recipe here because it’s one of my go-to recipes for a lazy breakfast when I get sick of eating bread. I’m always eating my peanut butter bread in lectures which got really boring, so at one point, I started bringing my overnight oats in a small flask to school. But it’s a bit difficult to multitask eating oats with writing notes, so I gave up on that and reverted back to peanut butter bread. On a side note, the amount of peanut butter I consume scares me.

Even though I stopped bringing my oats to school, I never stopped making them at home for my weekends. I always have green apple and ground cinnamon at home, and can never say no to apple crumble so tadah, apple crumble overnight oats πŸ™‚

I made these for my Swiss friends when they came to stay in Singapore in June and they looooved it. So I’m sure you’ll love it too. And even if you don’t like apple and cinnamon, you can always play around with the flavours and add weird things to the oats. Just stick by the yogurt, milk and oats ratio for everything you do and you’ll be fine.

Oh, and don’t try adding milo. Looks like diarrhoea and doesn’t taste fantastic. Don’t say I didn’t warn you.

541A3130-2

Ingredients
1/2 cup rolled oats
1/2 cup plain yogurt
1/2 cup fresh milk
2 tbsp chia seeds
1/2 grated green apple
cinnamon
1 tbsp flax seed powder
Granola

Directions
1. Mix rolled oats, plain yogurt, fresh milk, chia seeds and grated green apple 2. in a mason jar/ bowl.
3. Sprinkle as much cinnamon as you desire.
4. Place it in the fridge overnight.
5. In the morning, top the jar of oats with more grated green apple, flax seed powder and some granola. It’s up to you! πŸ™‚
*You can add more milk in the morning if the oats are too thick for you

Yogurt Pancakes

541A2997-2

It is very very coincidentally, Pancake Day! Which happens the day before Lent starts because it’s full of fat which is traditionally forbidden during Lent. Whoa. That’s cool.

541A2966-2

This is probably my fourth pancake recipe on the blog but probably the easiest and most full-proof one out of all. The best part of this recipe is that it can be done in 30 minutes because it requires no whipping of egg whites separately. I was super tempted to whisk the egg whites separately but I decided to trust that the yogurt would do its job. And sure it did, the yogurt made the pancakes fluffy and tender.

This recipe is going to be part of my breakfast-in-bed series that I’m currently working on for The Auricle, a med school yearly publication so do keep a look out for that :>

541A2931-2-3

Ingredients
makes 15 pancakes
1 1/2 cup self raising flour
3/4 tsp baking soda
3 tbsp sugar
3/4 cup milk
3/4 cup yogurt
2 large eggs

Directions
1. Sift flour and soda into bowl.
2. Add in sugar. Make a well in the centre.
3. Whisk milk and yogurt until smooth.
4. Whisk in eggs and butter until mixture is foamy.
5. Pour mixture into well and fold.
6. Let the batter rest for 10 minutes before frying the pancakes.

Earl Grey Tea Cake

541A2548 My House (another name for class in Med school) held a Christmas/ New Year party today and I decided to make an Earl Grey Tea Cake for dessert πŸ™‚ I first tried this tea cake at a cafe in Lavender but it was quite expensive, about $4 for a slice. I did like the flavours though, so I tried to replicate it at home.

When the cake first came out of the oven, I fell in love with the texture. But when I kept it in the fridge overnight, the cake became a bit dry which wasn’t to anyone’s liking. So I’ll most probably be tweaking this recipe by adding in yogurt for a moist cake!

Another gripe I had was that the Earl Grey Tea flavour was not strong enough. The taste was good enough but stronger would be better. So perhaps use more tea bags next time for the milk infusion?

I’ll post the updated version after my exams when I have time to play around in my kitchen but till then 😦 Goodbye!

Ps. The photos are prettier this time round because I took them on D’s pretty new hipster wooden table πŸ™‚

541A2556541A2551

Ingredients
240ml whole milk
4 bags Earl Grey tea
360 grams all-purpose flour
2Β½ teaspoons baking powder
225 grams salted butter, at room temperature
180 grams granulated sugar
4 large eggs, at room temperature

Directions
1. Simmer milk in saucepan over medium low heat
2. Add the Earl Grey tea bags into the milk, cover the lid of the saucepan and steep for 20 minutes.
3. After 20 mins, squeeze tea bags of any milk and ensure that the infused milk still adds up to 240ml. If it doesn’t, add more milk.
4. Cut open the earl grey tea bag to use the leaves inside. Whisk the leaves, flour and baking powder together.
5. In a stand mixer, cream butter and sugar together for 5-6 minutes until light and fluffy.
6. On low speed, add in eggs one by one until well-mixed.
7. Add in flour and milk tea in alternate batches until the flour is well-mixed, starting and ending with the flour mixture.
8. Preheat the oven to 175 degrees Celsius.
9. Pour the batter into your loaf pans.
10. Bake for 30-40 mins until the skewer comes out clean. Enjoy! πŸ™‚

Magic Matcha Cake

IMG_5883-2

Happy New Year! πŸ™‚

I haven’t posted in a long while because I haven’t touched baking for a really long time ): I was busy with my mission trip in the past month hence the lack of time. And now with exams just 2 weeks away? It calls for stress-baking.

I stumbled across these magic cakes while surfing the net and they seemed quite magical. With one batter, you get two textures. A custardy, soft filling at the bottom and a spongy cake at the top. It sounded too good to be true so I had to try it.

It did come out with 2 layers but I wasn’t in love with the custard. I don’t think custards are my kind of thing, so yup, I’m not going to make this again. But if you’re curious about this cake, give it a try! Maybe you’ll love the custard more than I did.

IMG_5879-2

Magic Matcha CakeΒ 
Ingredients
140g plain flour
2 tbsp matcha powder
113g butter
500ml milk
4 eggs, separated and at room temp
100g caster sugar
1 Tablespoon of Water

Directions
1. Melt butter
2. Warm up milk until lukewarm
3. Whisk egg yolks and sugar together until pale
4. Whisk in butter and water until well incorporated
5. Sift in flour and matcha powder, whisk
6. Slowly whisk in milk until everything is well mixed
7. In a separate bowl, whisk egg whites until stiff peaks
8. Fold in egg whites into mixture, 1/3 at a time
9. Preheat oven at 150 degrees Celsius
10. Pour batter into a greased 10 inch square baking pan
11. Bake for 30 mins or until top is golden brown. The middle of the cake should still be wobbly when you take it out!

Soft and Chewy Chocolate Chip Cookies

541A1346

541A1344

These are the cookies I will bake for my kids so that they can eat warm cookies and drink milk before they go to sleep hahahaha. Always wanted a mother who would feed me warm cookies and milk before my bedtime but I guess my mother had other ideas, like stuffing me with vegetables.

541A1317
These cookies are the soft and chewy kind, not the crispy kind. I actually prefer the soft and chewy kind because they have more body and the best part of these cookies are that when you bite into, there are bits of gooey stringe-y chocolate πŸ™‚

This is going to be my go-to chocolate chip cookie recipe from now onwards. It’s time to stock my fridge and freezer with cookie dough so that I can bake these cookies any time I crave for them.

541A1354

Ingredients
150g of butter
70g of packed brown sugar
50g of granulated sugar
1 large egg
1 tsp of vanilla extract
240g of unbleached all purpose flour
1/2 tsp baking soda
170g chopped dark chocolate

Directions
1. Cream butter and sugar at high speed until light and fluffy.
2. Turn down mixer to low speed and add in eggs and vanilla extract. Beat until well-combined.
3. Mix at high speed for 1 minute and then stop.
4. Whisk flour and baking soda together.
5. Fold in flour mixture into butter mixture, until just combined. The batter will be stiff.
6. Fold in chopped chocolate.
7. Using an ice-cream scooper and a scale, weigh out 48g sized balls.
8. Put the balls into the fridge for at least an hour. (You can fridge them for a few weeks and bake them whenever you want to eat fresh chocolate chip cookies)
9. Preheat the oven to 190 degrees Celsius, place the balls of dough onto a baking tray lined with baking paper and bake for exactly 11 minutes.
10. The cookies will come out looking slightly unbaked but just take them out because they will turn out perfect in the end. Let the cookies cool completely on the tray before transferring them anywhere, including your stomach.

Enjoy that nice, warm, soft, chewy, chocolate-stringy cookie :>

Roasted Chicken

541A1299

I’m baaaaaaack πŸ™‚ Sorry I’ve been away for so long because my exams just ended. All I’ve done for the past few weeks was sleep, mug, eat and sleep. But now that exams are over, I’m super excited to be baking and cooking for November :> before everything starts piling up again and there are exams again in January ):

Anyway, here is the roasted chicken a made a couple of weeks back which follows Heston’s way of cooking. If you don’t know who Heston Blumenthal is, he’s this eccentric British chef whose restaurant, Fat Duck, is a place I dream of eating at. But it’s going to cost at least $400 per person, so I’m just going to continue dreaming. He has really science-y ways of cooking stuff but it comes out perfect and this roasted chicken is very replicable at home!

I first ate this chicken at D’s place and it had one of the most tender chicken breast meat ever. It was soft and juicy, nothing like those dry, stringy breast meat I was used to. Sadly, the skin wasn’t crispy because we didn’t have time to blast it (it was 2 something by the time the chicken was cooked and we were famished). So without a doubt, I had to remake the chicken at home to get the crispy skin.

Preparing for this chicken takes a day and the roasting takes a few hours which makes it a bit troublesome but then there are really little skills involved. All you need to do is to brine the chicken overnight, dump it into your oven for 2 hours, then turn up your oven to its maximum temperature to blast the chicken and get that crispy skin.

It was actually quite epic to turn my oven up to the maximum temperature because when I opened the oven door, the entire kitchen filled with so much smoke that we all ran out. Oh oh oh be mentally prepared that your kitchen will smell like roasted chicken for the entire day hahahah.

Other than that, roast away!!! πŸ™‚

541A1288

Ingredients
1 kg whole raw chicken
Water
Salt
50g of melted butter
1 Lemon
Pepper
Herbs de Provence

Directions
1. Mix 1 litre of water and 40g of salt. You can change the amount of water according to how much you need to cover the chicken but always use this ratio of 1 litre of water to 40g of salt.
2. In a pot large enough to fit your chicken but small enough to reside in your fridge, place the chicken and pour the salt water over, ensure that the water completely covers the chicken.
3. Place the pot in the fridge and leave it overnight.
4. The next morning, pour away the salt water and replace it with normal water.
5. When you want to cook the chicken, take the chicken out and pat it dry.
6. Place it on a baking tray and brush it with melted butter. Sprinkle the herbs, salt and pepper on the chicken.
7. Roast it at 100 degrees until the thickest part of the breast meat reaches 60 degrees Celsius.
8. Take the chicken out and let it rest for 45 minutes.
9. Turn your oven up to its maximum temperature.
10. Brush your chicken with melted butter again and place it in the oven.
11. Roast it for about 10 minutes or until the skin is golden brown and crispy.

Japanese Cheesecake

cheesecake

School is getting dreadful particularly because lectures are only in the afternoon and I have activities all the way till night, making me so exhausted that I have decided to declare one day of school holiday every week. So today’s my holiday for the week and holidays mean that there’s time to bake πŸ™‚ Found a block of cream cheese lying around in my fridge so I decided to make Japanese cheese cake. I tried it before with Kim last time and it turned out not bad, though the water bath soaked the bottom of our cake >: So this time, I’m doing away with the water bath because I can’t be bothered. The water bath is supposed to prevent cracking on the surface but I don’t really care about appearances as long as the cake tastes good? Hahaha I am obviously not the typical kind of baker.

If you realised, all the stuff that I bake are plain and not decorated, mostly because I like to keep things simple and my taste palate clean. I don’t fancy cupcakes or complicated flavours but rather the classics. Anyway, enough about me and my preferences, here’s the recipe for my Japanese cheesecake! Enjoy πŸ™‚

541A1271

Ingredients
250 ml milk
250 gm cream cheese, room temperature
60 gm butter, room temperature
6 egg yolks
55 gm cake flour
20 gm corn flour
1 lemon zest
6 egg whites
1/4 tsp cream of tartar
130 gm caster sugar

Directions
1. Set up a water bath (boiling pot of water with a bowl above, making sure the bowl does not touch the water).
2. Place milk into the bowl
3. Add cream cheese, stir until completely dissolved and mixture is smooth.
4. Add butter and stir till dissolved.
5. Remove from heat and cool.
6. Add egg yolks and combine.
7. Sift flours into cream cheese mixture. Mix well, ensuring no lumps.
8. Add freshly grated lemon zest.
9. Beat eggs white with cream of tartar and sugar, till stiff peaks.
10. Fold in 1/3 of the egg whites into cream cheese mixture. Repeat till all the egg whites are incorporated.
11. Pour into 9 inch baking tin.
12. Bake for 50 to 60 minutes, until skewer comes out clean.
13. Leave oven door ajar for 10 minutes before taking it out to cool.

Pandan Chiffon Cake

IMG_7240

IMG_7237-2

My mother has been baking a lot recently and she’s only been baking this chiffon cake. She likes to perfect a cake before moving on to the next cake. So if she’s on to chiffon cake, it’s going to be chiffon cake for the next few months.

Anyway, I’m not really complaining because this pandan chiffon cake is leagues ahead of the store-bought ones. And it’s a local flavoured kind of cake so it’s popular amongst everyone, especially the elderly.

I’ve been feeling a bit down lately and in the midst of my unhappiness, I felt that I wanted to make other people happy so I decided to bake two cakes for the cleaners in school to eat for their tea break. I’ve always wanted to do something to show my appreciation for their hard work and also because most of them are old and cleaning toilets isn’t the easiest thing to do. The least that I could do was bake them something to show that someone actually appreciates what they do πŸ™‚

Some aunties were quite lukewarm towards my gesture but some aunties were overjoyed and I guess even if I could only make one aunty smile, baking the cake would have been worth it πŸ™‚ No words can describe the joy that filled my heart when I saw how genuinely happy the aunty was. I’m thankful that I can be a blessing to others through the talents God has blessed me with. I hope that in the midst of all our busyness, we remember to be a blessing to others!

Anyway, here’s the recipe for the Pandan Chiffon Cake! It’s a really easy cake to bake, takes less than 30 minutes, so there’s no excuse to not bake this for the people you love! πŸ™‚

IMG_7238-2

Ingredients
5 egg yolks
20g of sugar
100g cake flour
1 tbsp baking powder
100ml coconut milk
2 tbsp pandan juice
3 tbsp cooking oil

5 egg whites
60g sugar
1/2 tsp cream of tartar

Directions
1. Whisk egg yolks and 20g of sugar until thick.
2. Whisk in coconut milk and pandan juice.
3. Whisk in sieved flour and baking powder.
4. Whisk in cooking oil. Set aside.
5. In another bowl, whisk egg whites with cream of tartar and 60g of sugar until stiff peaks.
6. Fold in 1/3 of the egg whites into the flour mixture.
7. Repeat until all the egg whites have been folded in.
8. Pour into mould (you can buy from Phoon Huat!) and place in preheated oven of 145 degrees Celsius.
9. Bake for 25 minutes or until the cake has separated from the middle ring.